Grouting a 60" Pipe For Abandonment


Project scope summary: Install a 124-060 plug configured as a Grout Bag into a 60” lake water pipeline through an 18” X 18” cut hole in the top of the pipeline. Water head was a few inches above the top of the horizontal pipe.
The grout bag used had two ports centered on one end. The 1” npt pressure monitoring and discharge port connected to a 1” internal buoyant hose extending ½ the deflated length of the plug. The other port was a 1 ¼”npt for inflation and grout filling and did not have an internal hose.
Prior to insertion Grout Tech connected each port to a 90 elbow and a 60” length of galvanized pipe extending perpendicular to the plug. These pipes were also used to help manipulate the grout bag into the pipeline. Ball valves and cam and groove connectors were added to these pipes for hose connection after the plug was in place.
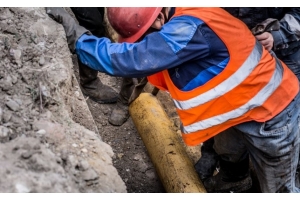
The grout bag was inserted by three men manually pushing it through an 18” x 18” hole cut into the top of the pipe. They pushed the bag into the hole with 2X4 boards to help evacuate the air and pushed it down the pipeline with 2x4 and 2X6 boards connected together with wood screws. The lead board had a V notch to push on the leading end anchor straps. A ¼” poly rope was attached to the leading end strap to keep it under a slight pulling tension to prevent the strap from slipping out of the slot. The first attempt did not work because the slot was too narrow and when the board was pulled back it pulled that end of the plug with it. The plug had to be removed and reinserted.
The grout bag was inflated first with a high volume air compressor and inadvertently inflated to 10 psi. The pressure was quickly released to maintain 4 to 6psi air inflation. Rated grout bag pressure was 8 psig.
After air inflation the 1” air inflation ball valve was closed and 1 ¼” grout valve opened to begin the grout filling. The 1” ball valve on the discharge pipe was opened slightly to release the air displaced by the grout and maintain inflation pressure between 4 and 5 ½ psi.
Neat concrete was used for grout with approximately one cu ft of concrete to a cu ft of water. About ½ quart of bentonite was added to each three 97 lb bag mix to help prevent grout shrinkage. The concrete was pumped slowly; it took about three hours for 100 bags of concrete. 150 bags were used to fill the plug. The grout bag would be considered full when a steady stream of grout flowed out of the 1” discharge valve. When the discharge became steady gray water the 1” nipple broke off from the grout bag. The filling was stopped because the pressure could not be maintained in the grout bag. It is unfortunate the discharge pipe broke as it was not possible to confirm that the grout bag would completely fill and seal the pipeline.
The downstream section of pipe was dewaters with a pump and it was observed that the grout bag filled the pipe to about ½” from the top. The ½” gap was filled with thin grout bags well enough for the pipeline downstream of the grout bag to dewatered and removed. Since there is a small amount of flow above the grout bag the pipeline will have a plate welded on the end.
Suggested system improvements:
- Use PVC pipe instead of the wood boards to push the grout bag into place. Use rope to keep tension on the grout bag strap in the PVC pipe slot and to measure the distance inserted. Even the standard internal stiffener is not a guarantee the plug will not fold over on itself.
- During installation the plug twisted and ports considerably restricted slowing the escape of air. In the future it will be advisable to add a length of hose or some apparatus to keep both ports open. Plugs with a bow stiffener may not have this problem. Air also was trapped between the multiple plies and only slowly seeped out.
- The 1” discharge pipe was used to help manipulate the grout bag into the pipeline and may have weakened it at the grout bag port causing the failure during the filling process. In the future connect the hose directly to the grout bag and use some other device for positioning.


